EVE-NG Quick Setup Guide
Table of Contents
Background#
What is Virtualization?#
Long gone are the days of having separate hardware for each service provided.
Companies used to have:
- A Physical Web Server
- A Physical File Share Server
- A Physical Mail Server
- A Physical Server for every unique application
A service or application traditionally had it’s own hardware, as to not conflict with other services.
This model was replaced with the advancement and widespread adoption of virtualization technologies.
In short, virtualization is the separation between Operating Systems(OS) and the hardware they run on. With virtualization for example, we can run 50 different instances of Windows 10, Linux, Etc, on the same hardware, all in their own isolated logical bubble.
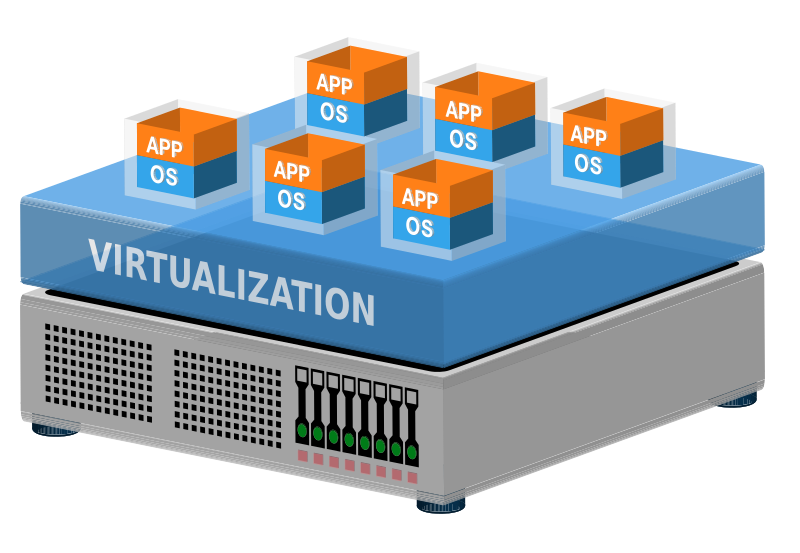
This allows us to take a pool of resources (Memory, Storage, Compute) and distribute them out to Virtual Machines(VMs) on either a reserved or as-needed basis.
What is EVE-NG?#
EVE-NG is a free platform where we can create intricate lab topologies of virtualized devices, such as Cisco routers or switches, connect them in any way you would like, and access them via an easy to use web-GUI.
After it is installed, you load real device images, such as a Cisco CSR1000v or a Palo Alto firewall, which you can then connect to other devices and interact with it through native or web-based SSH/VNC/RDP sessions.
Software like EVE-NG and GNS3 have completely changed the way network engineers study for higher level certs like CCNP, or CCIE.
Before, using anything less than real equipment was a massive headache, filled with compromises.
But now, with how far along programs like EVE-NG have come, this is without a doubt the easiest way to interact with “real” gear.
1.0 VMWare#
VMWare Workstation Player is a free Type II Hypervisor, meaning it runs on-top of an OS, as opposed to a Type I hypervisor which runs directly on the hardware.
We will use this virtualization software to run our EVE-NG Server directly on our local PC.
Download VMWare Workstation Player
2.0 EVE-NG Install#
Once you have installed VMWare Workstation Player, it’s now time to download and install our EVE-NG VM.
Download EVE-NG Community Edition
First, lets choose how we want to install EVE-NG. We have two options
- ISO File
- OVF File
The ISO file will take you through a traditional install, where you create a new VM and set the ISO file as the disk drive. It will then take you through a lengthy install process.
The OVF file will leverage the advantages of virtualization by allowing us to quickly import an already installed EVE-NG VM. This method is much faster.
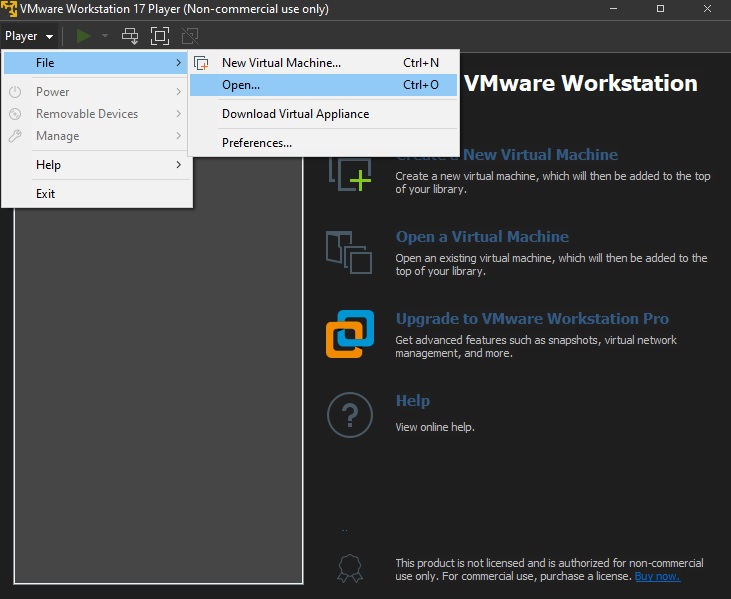
2.1 Import OVF#
Simply open up the previously downloaded OVF file with VMWare Workstation Player, and you will then effectively import a ubuntu server VM with EVE-NG pre-installed.
Give your new VM a name and file path. This is where the entire VM will be stored.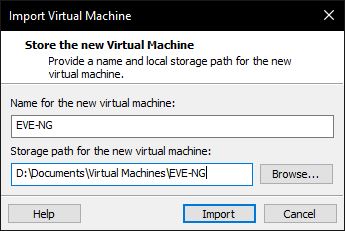
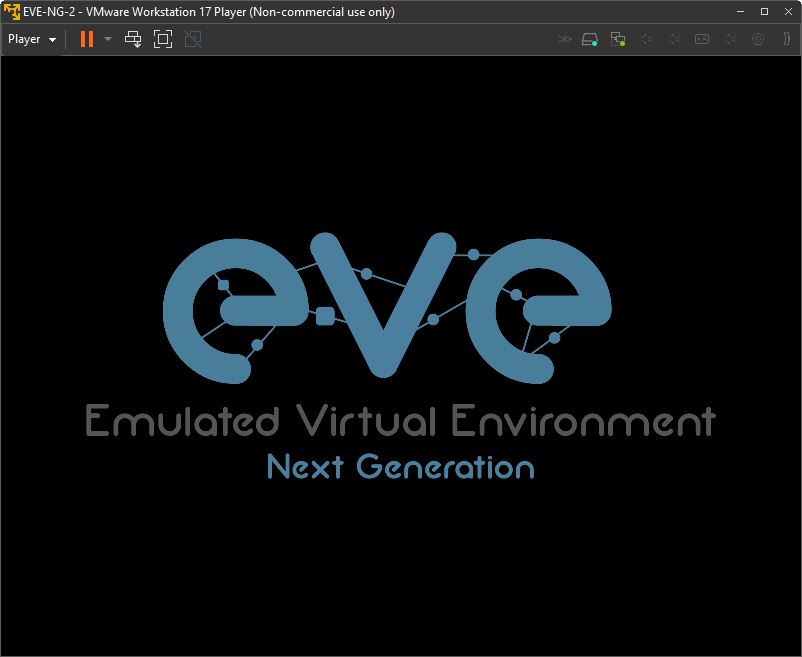
Once you have the VM imported, right click it and select “Power On”. The VM will now turn on and EVE-NG will boot up.
2.2 Initial Config#
You will be prompted with a login screen, notice how your web-GUI IP address is presented, in this case “http://192.168.8.227”
Login with :
- username: root
- password: eve

You will be prompted to change the root password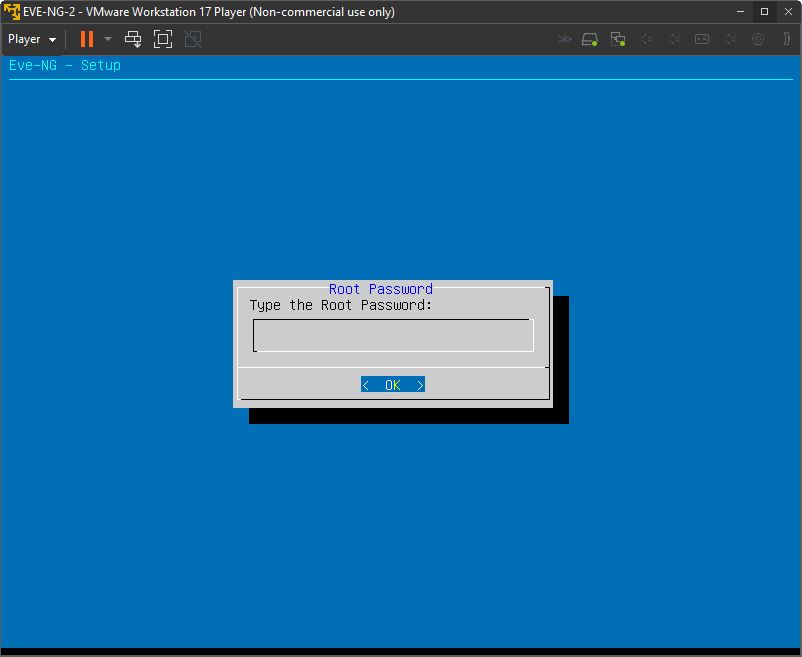
After this screen, you can leave the following screens on their default value, press enter until the wizard exits.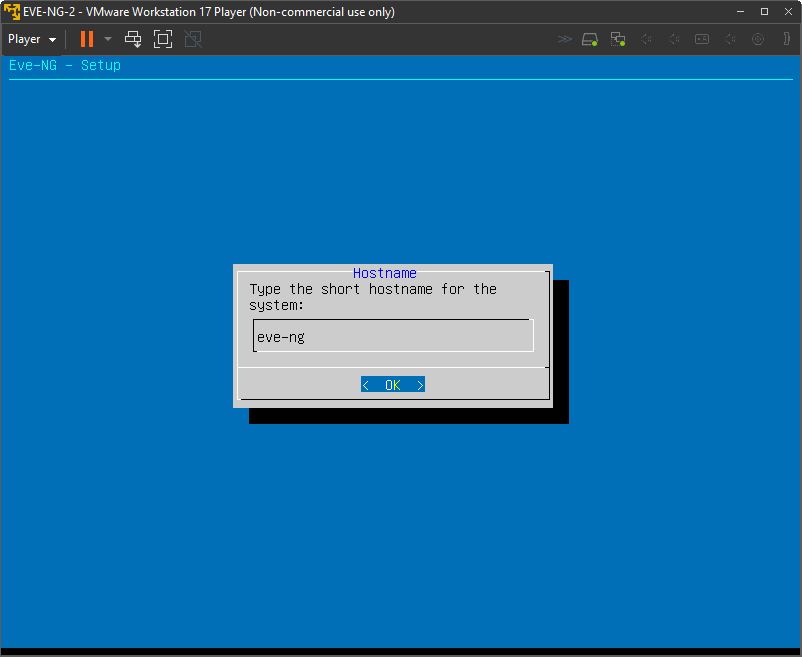
2.3 Function Test#
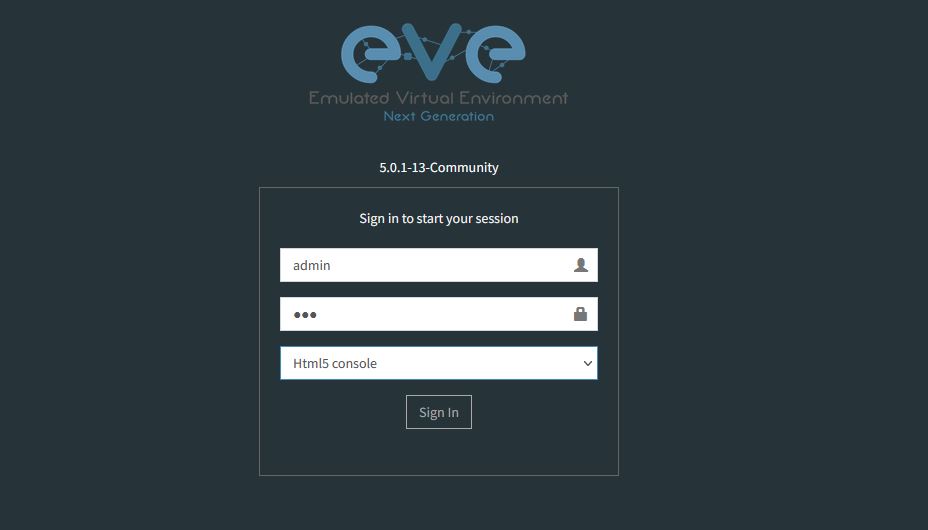
Navigate to the URL that was displayed on the initial login screen
Default Login :
- username: admin
- password: eve
You need to install the EVE-NG client pack if you eventually want to use Native Console. It will allow you to telnet into emulated devices with Putty/SecureCRT running on your PC, as opposed to an HTML5 Client
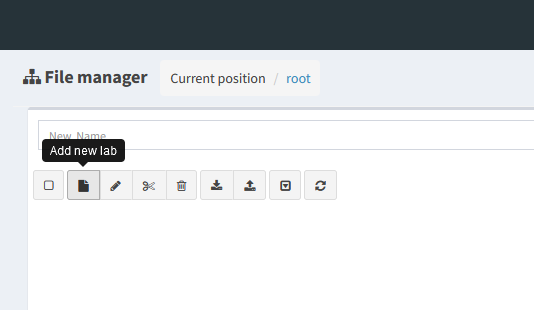
Select the “New Lab” button, give it a name, and hit ‘Save’.
- At the top of the menu on the left side, select the “+” icon to add a new node.
- At the drop-down, select “Virtual PC (VPCS)” and create
- Right click the node and select “Start”. It should turn blue
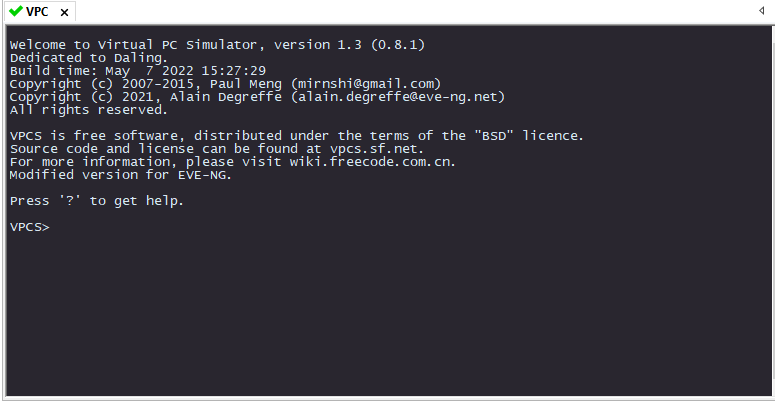
- Double Click the node and ensure your chosen method of console (Native or HTML) is functional
This is a very simple “PC CLI” emulator that can perform simple tasks such as ping, DNS queries, and act as a DHCP client.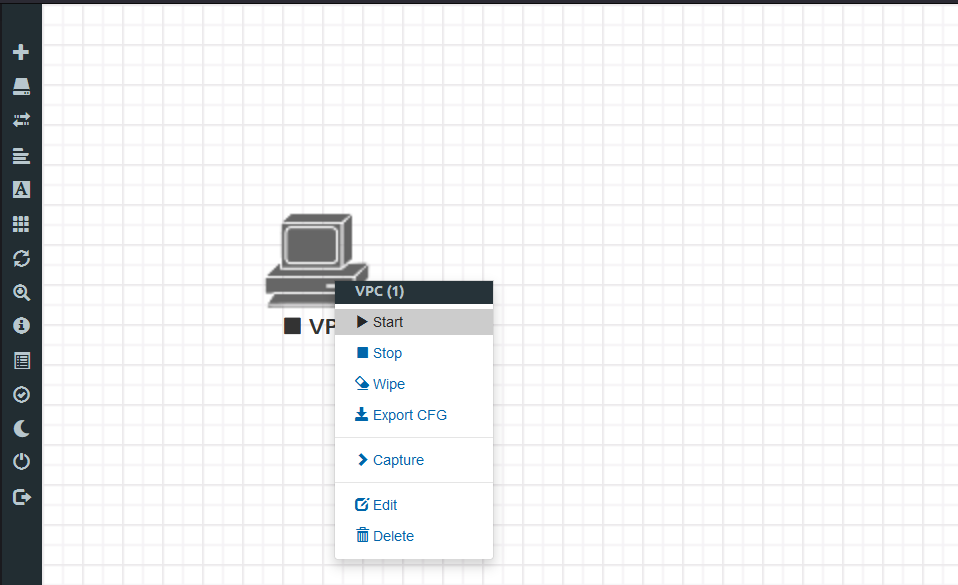
Conclusion#
You have now successfully installed EVE-NG onto your local machine and have verified it’s ability to emulate a pre-installed device image
To be able to SSH/VNC/Wireshark to these devices directly from your local PC, I reccomend you install the EVE-NG Client Pack found here: EVE-NG Windows Client Side Pack
What’s Next?#
- Learn How To Add Device Images so you can get started creating realistic labs.
- Deploy EVE-NG on Azure Cloud so you can access it anywhere, anytime.
- Create a Network Automation Lab to start learning highly marketable automation skills.